# Payments and Subscriptions
When you’re ready to charge for your app, and turn it into a product — subscriptions, one-time purchases, or usage-based billing, CodeWords connects to Stripe to handle checkout, renewals, and billing management.
This page explains what you need, how to set it up, and what happens once payments are live.
### How it works
CodeWords uses Stripe for payment processing. Stripe handles sensitive card data securely, so your app never stores or processes credit card numbers. Your users complete payment on Stripe Checkout, and Stripe notifies your app about billing events through webhooks.
### What you need
Before Cody can set up payments, you’ll need a Stripe account and a few values from the Stripe dashboard.
#### Stripe account
Create an account at Stripe and complete verification so Stripe can pay out to your bank. You’ll provide identity verification and banking details during setup.
#### API keys
Stripe provides two sets of keys:
* **Test keys** for development
* **Live keys** for production
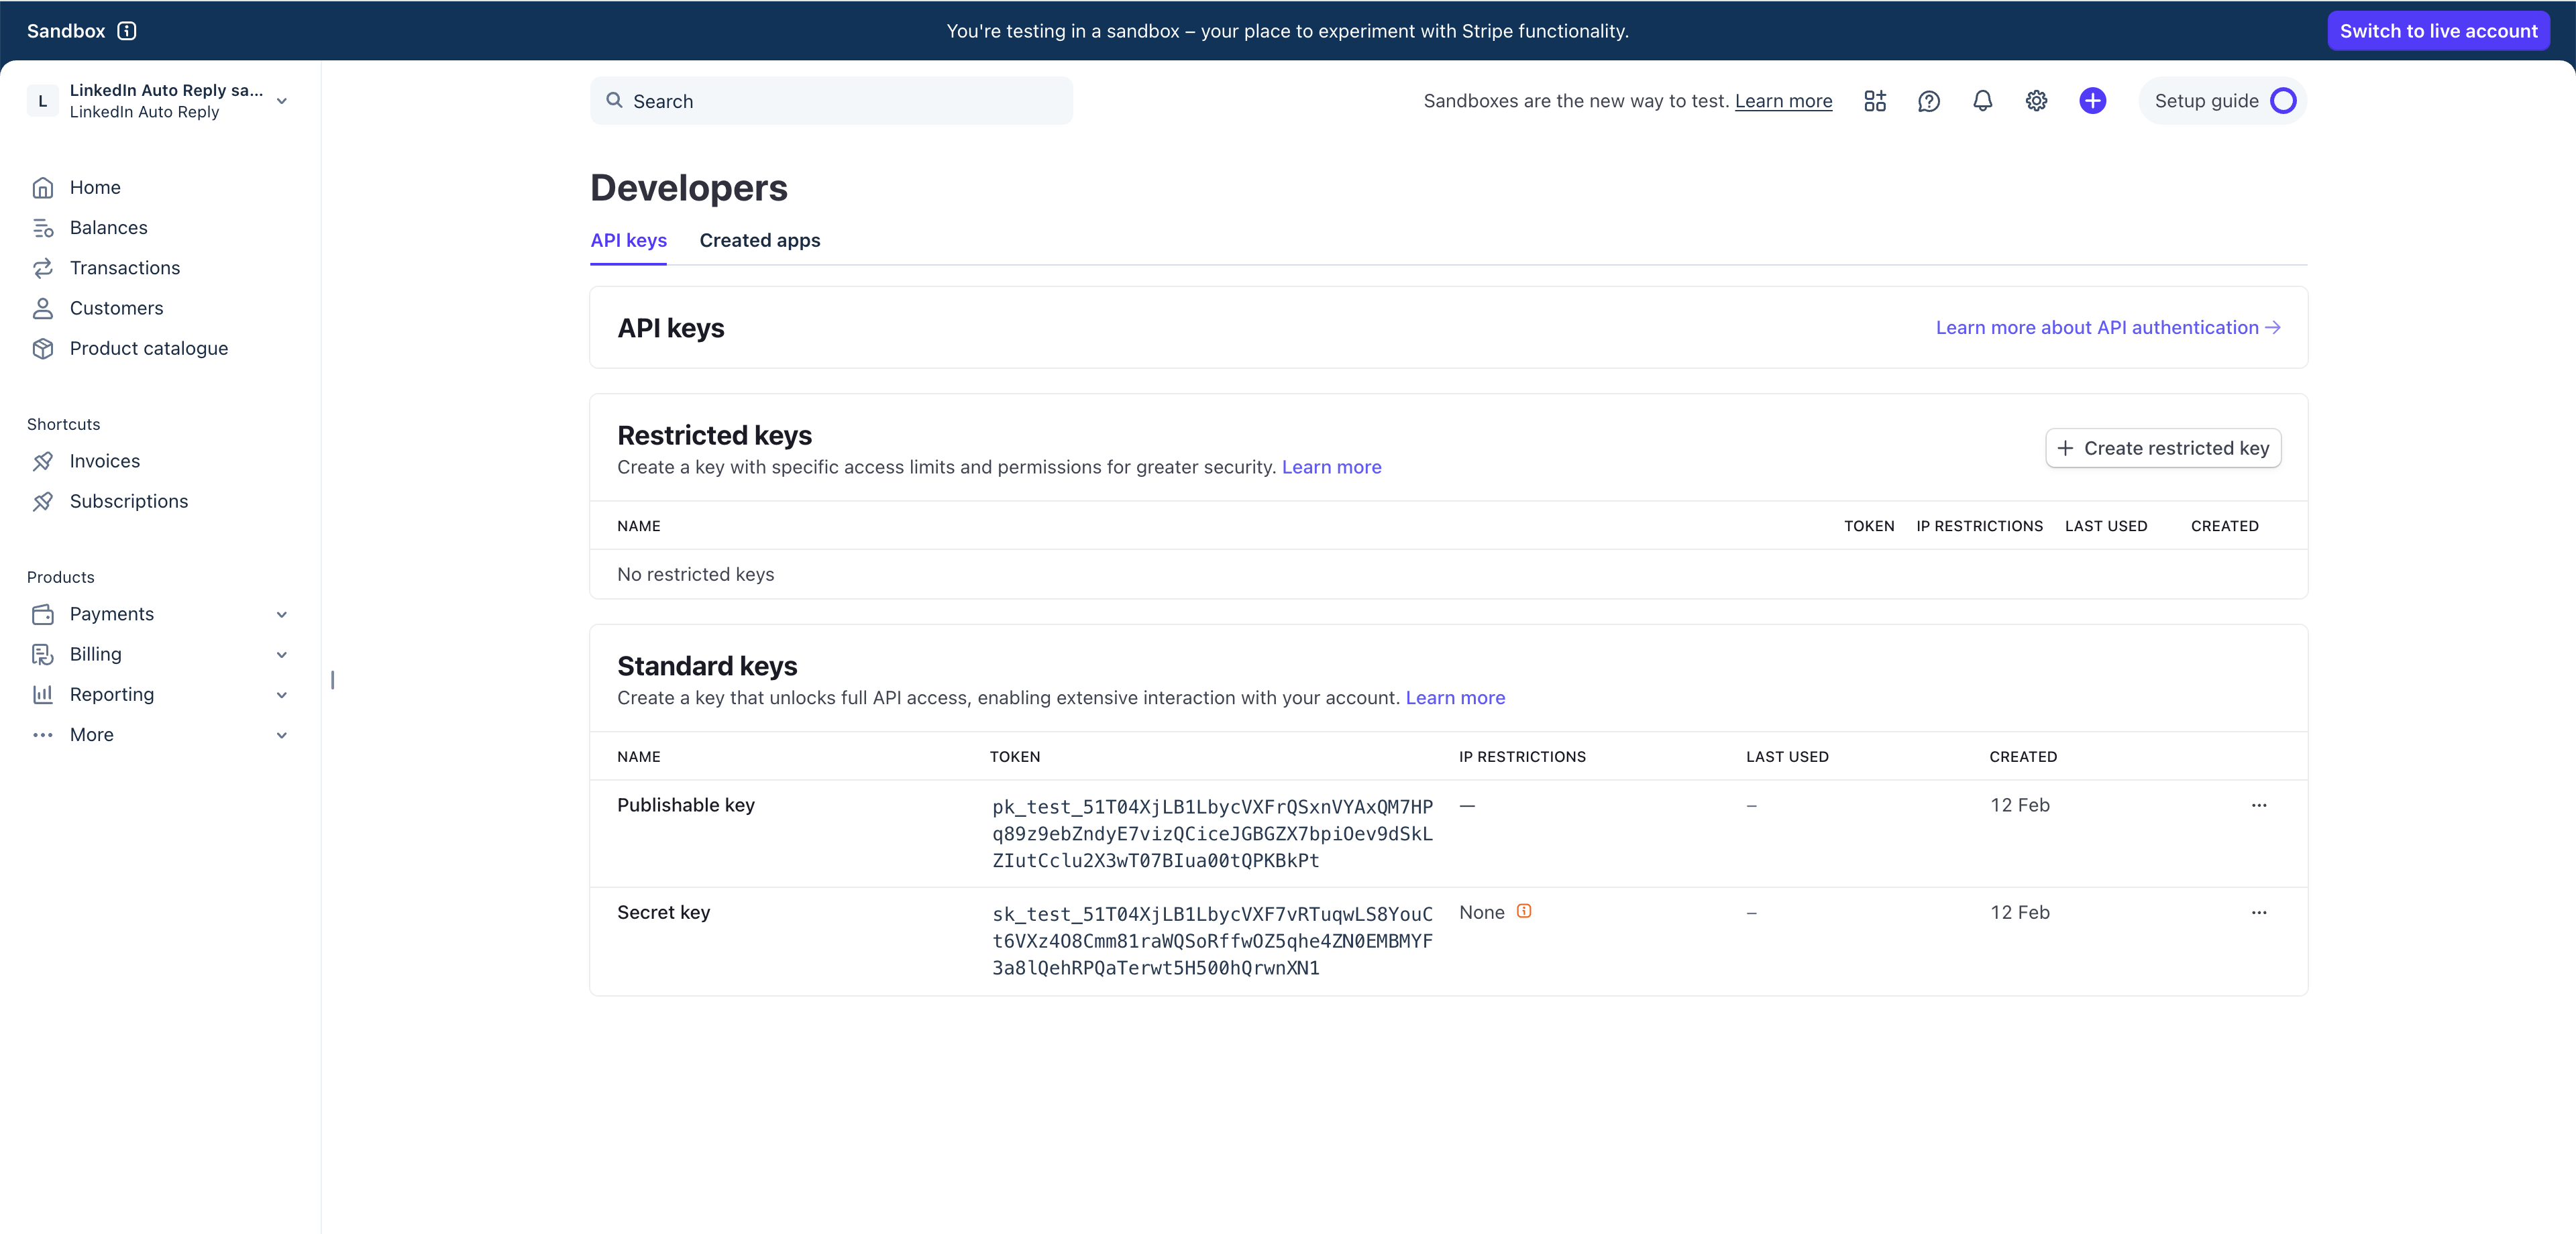
You can find both in **Stripe → Developers → API keys**.
| Key | Starts with | Used where | Safe for frontend? |
| --------------- | ----------------------- | ------------------------------------------------------ | ------------------ |
| Publishable key | `pk_test_` / `pk_live_` | Frontend (loads Stripe Checkout) | Yes |
| Secret key | `sk_test_` / `sk_live_` | Backend only (creates sessions, manages subscriptions) | No |
Cody will ask for both. The publishable key is used in the frontend. The secret key is stored as a backend-only environment variable and must never be exposed.
### Chat‑driven auto‑setup (recommended)
{% stepper %}
{% step %}
**Create your Stripe account**
Sign up, complete verification and then go to [dashboard.stripe.com](https://dashboard.stripe.com/)
{% endstep %}
{% step %}
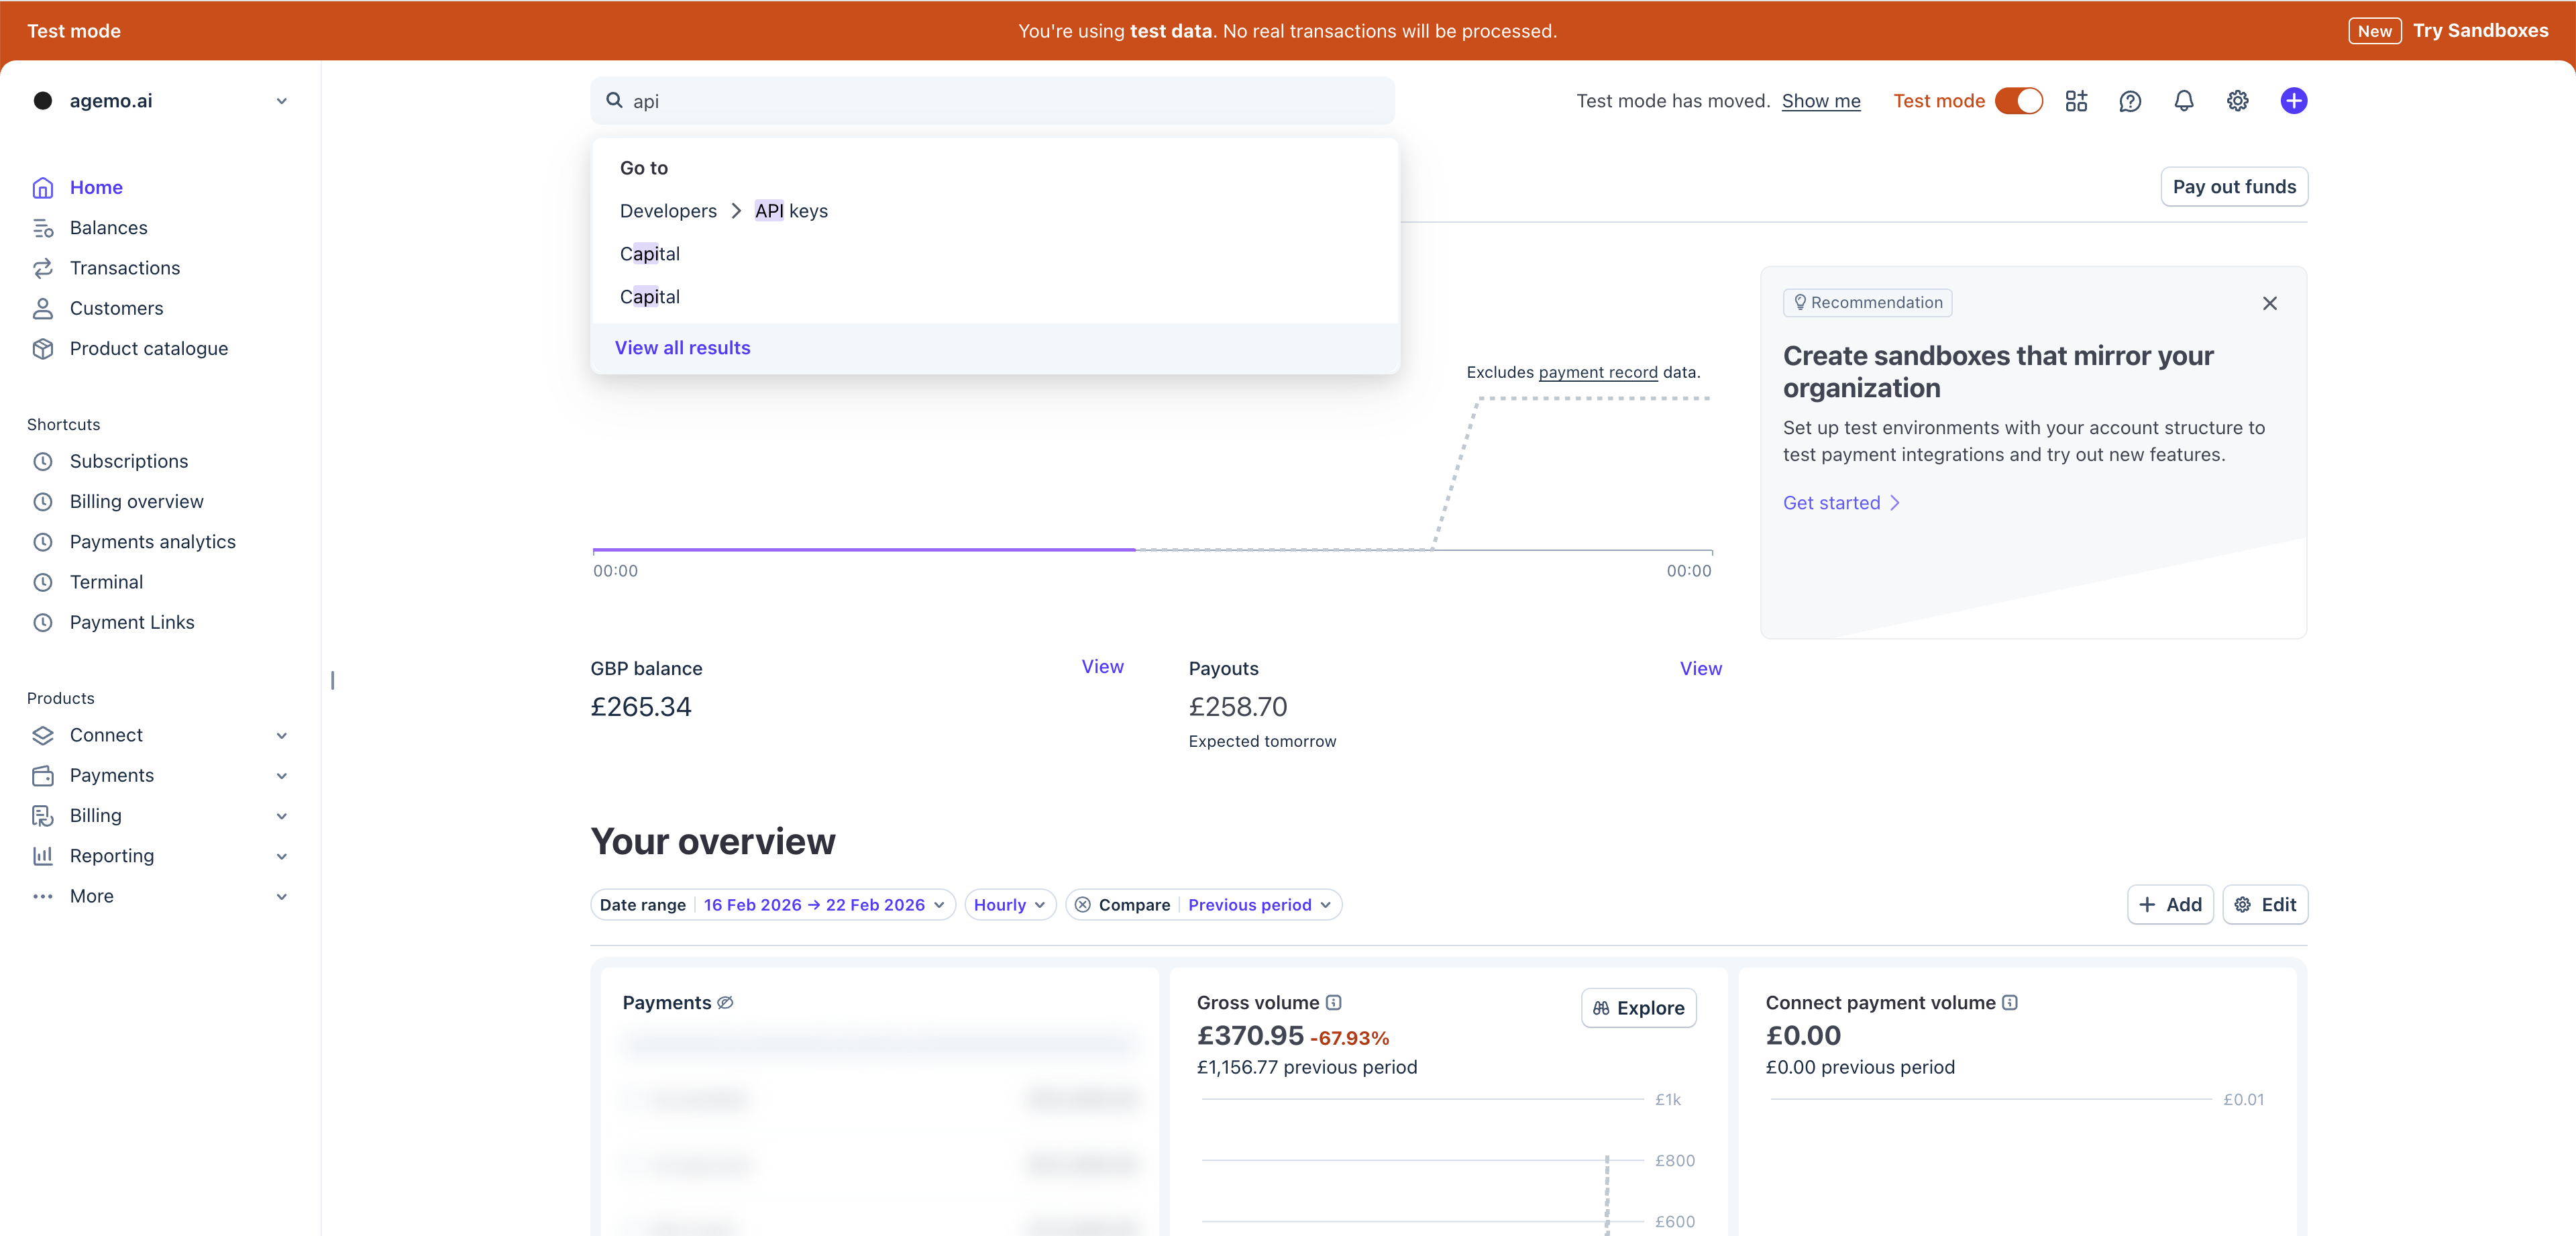
**Switch to "Test mode"**
In the top-right corner, make sure the "Test mode" toggle is turned ON (it'll show an orange banner).
Search for API Keys in the search bar to navigate to **Developers → API keys**.
{% endstep %}
{% step %}
Share the **Publishable Key** & the **Secret Key** from the **Developers → API keys** to Cody.
{% endstep %}
{% step %}
**Share the payment plans you want to implement**
Tell Cody what **subscription** or **one-time payment** you want to create and cody will create them programmatically via the API.
{% code overflow="wrap" fullWidth="false" %}
```
"Design a monthly subscription model offering three plans: Basic at $20 per month, Pro at $50 per month, and Business at $100 per month."
```
{% endcode %}
{% endstep %}
{% step %}
**Test the payment plans**
Test the payment plans by using the [stripe test card](https://docs.stripe.com/testing) to ensure its working correctly.
{% endstep %}
{% step %}
**Switch to live mode and share the live API key.**
Now that you have confirmed all the tests are working correctly, Cody should be able to create the live products on your stripe account once you share the key.
{% endstep %}
{% endstepper %}
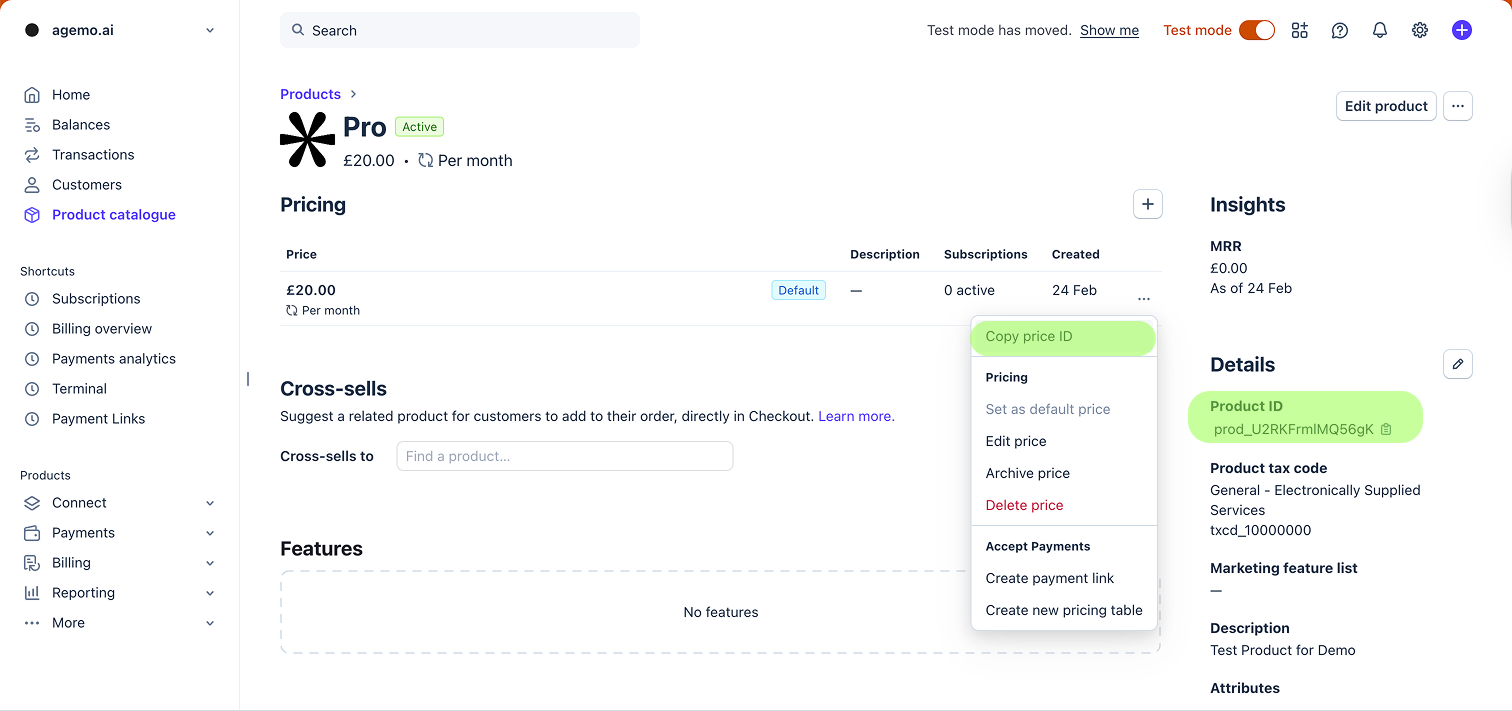
#### Products and prices
Create your plans in **Stripe → Products**. Cody needs the **Price ID** (starts with `price_`) for each plan you want to sell (for example: monthly and annual).
### Setting it up manually - You create in Stripe, share IDs with Cody
{% stepper %}
{% step %}
**Create your Stripe account**
Sign up, complete verification and then go to [dashboard.stripe.com](https://dashboard.stripe.com/)
{% endstep %}
{% step %}
**Switch to** "**Test mode**"
In the top-right corner, make sure the **"Test mode"** toggle is turned **ON** (it'll show an orange banner)
{% endstep %}
{% step %}
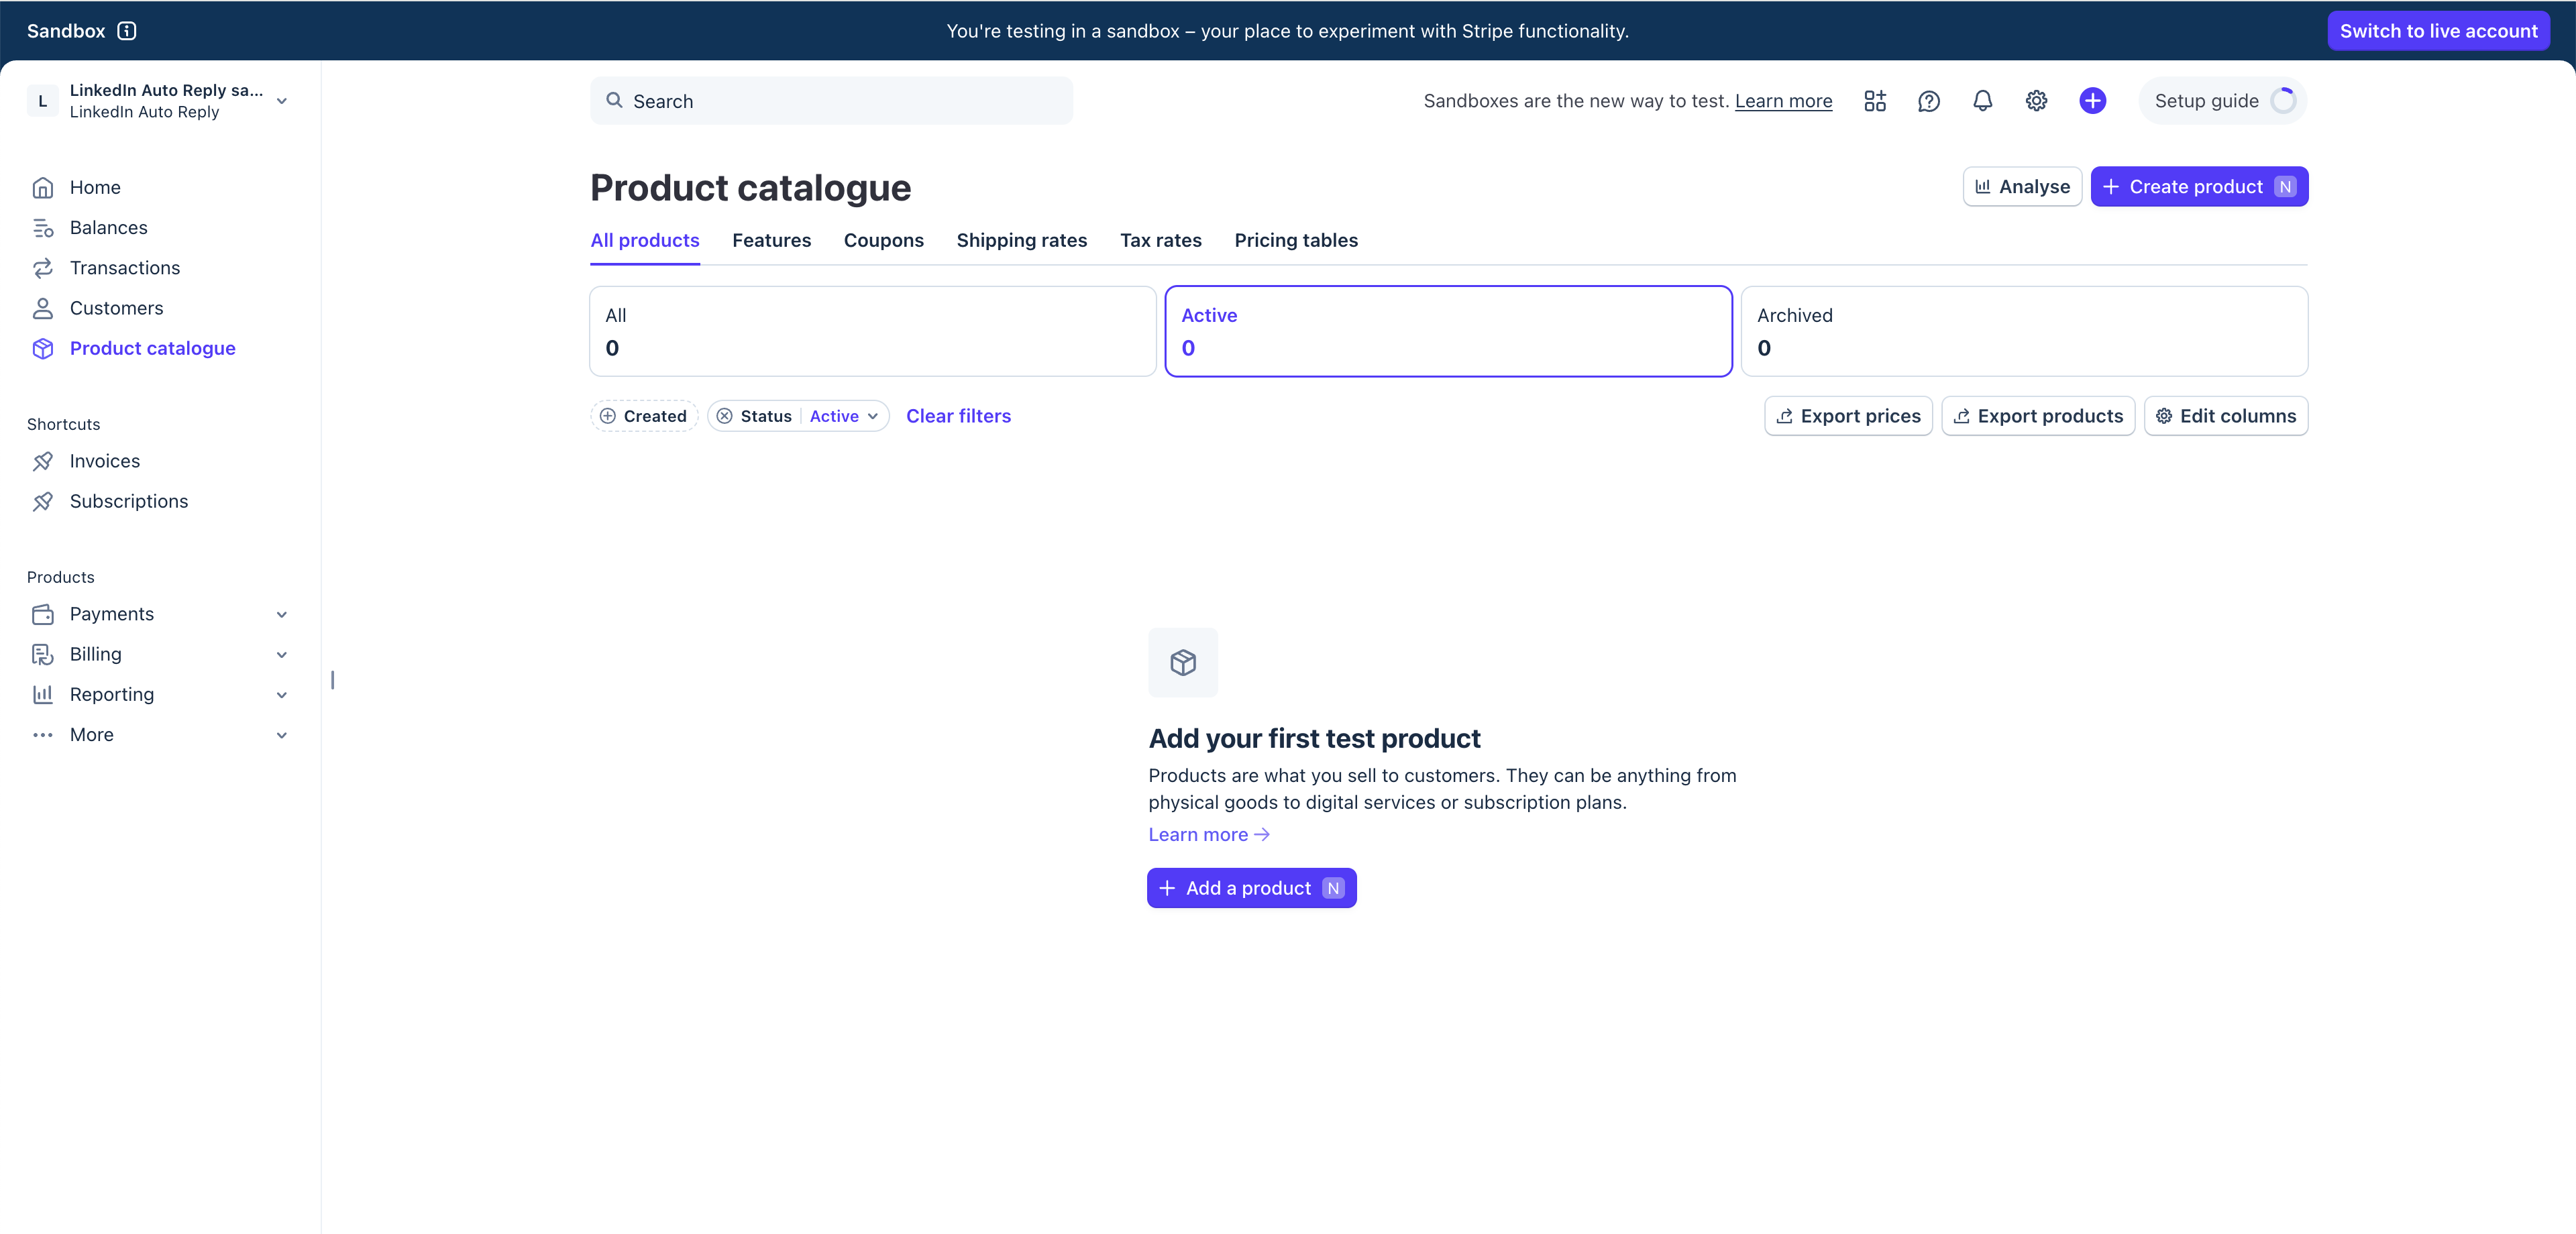
**Navigate to the Product Catalogue to create a Product**
This is what your customers will subscribe to.
Go to the [Products Catalogue](https://dashboard.stripe.com/test/products) page in the sidebar(or search "Products")
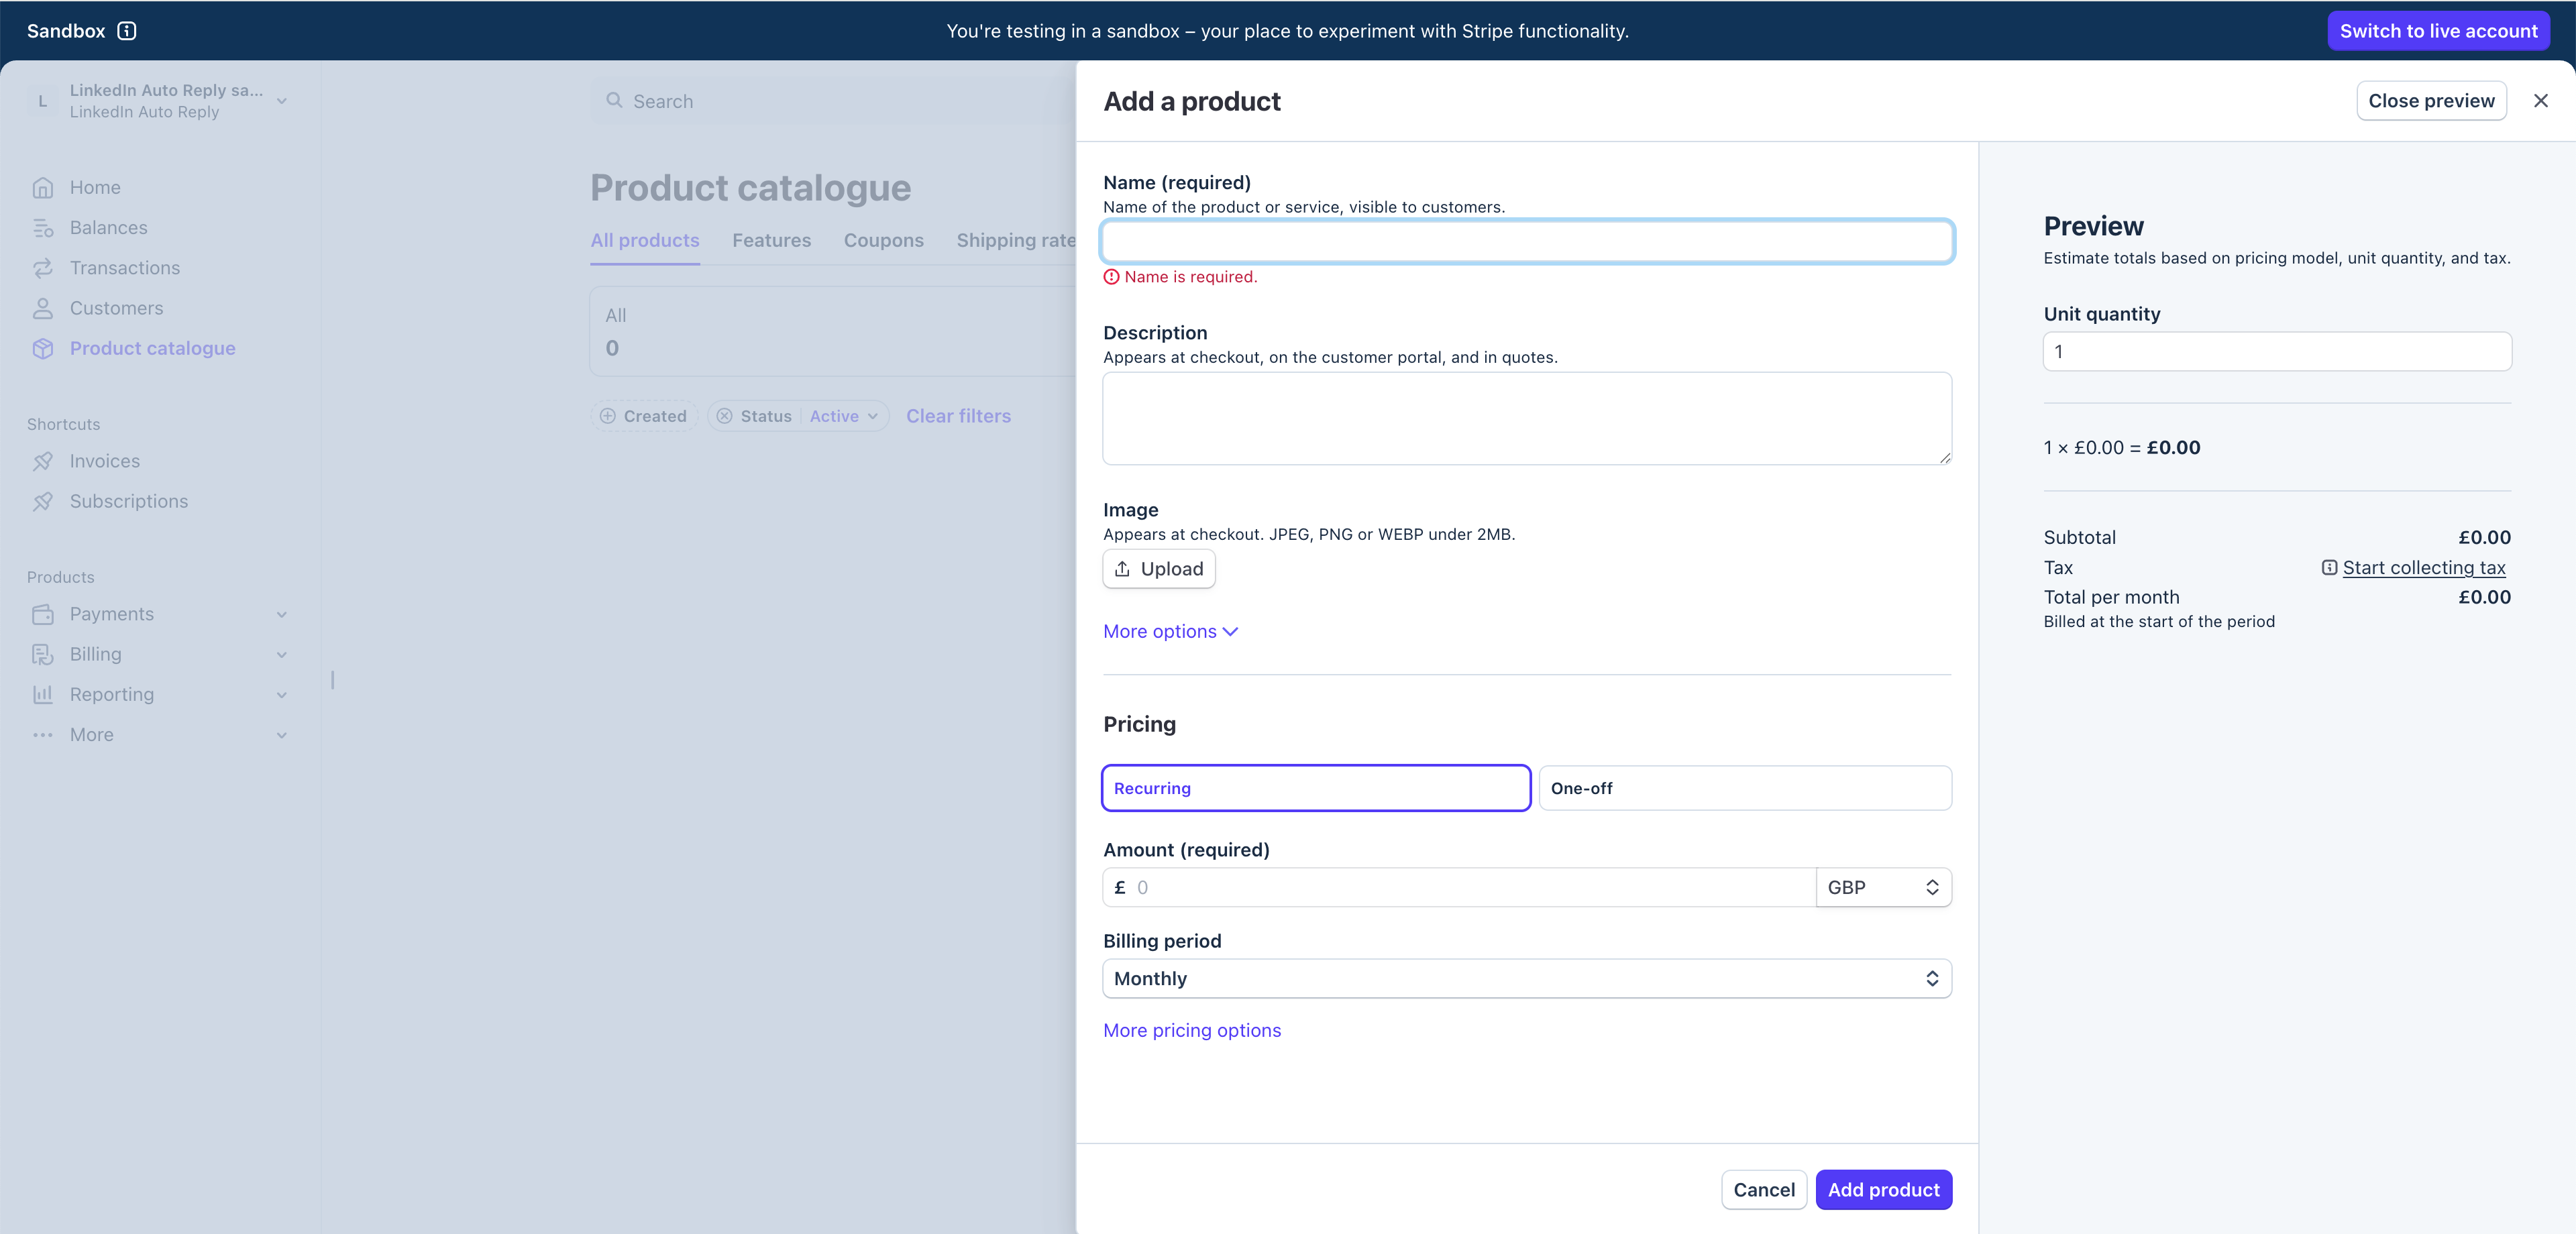
Add a Product and Pricing related to that product.
Start by providing a name(eg: Fee, Pro, Max, Business), Image & Pricing details.
{% endstep %}
{% step %}
**Sharing the Product ID and Price ID of the product**\
\
Once you have created the products, share the **Price ID** and **Product ID** of the products you created on stripe and specify the pricing and billing details(Recurring/One-off, Amount & Billing period) with Cody.
{% endstep %}
{% step %}
**Creating the Pricing Page & Testing**
Once this is done, Cody should create a pricing page for your product and you can test if the payment is working using the stripe test cards.
{% endstep %}
{% step %}
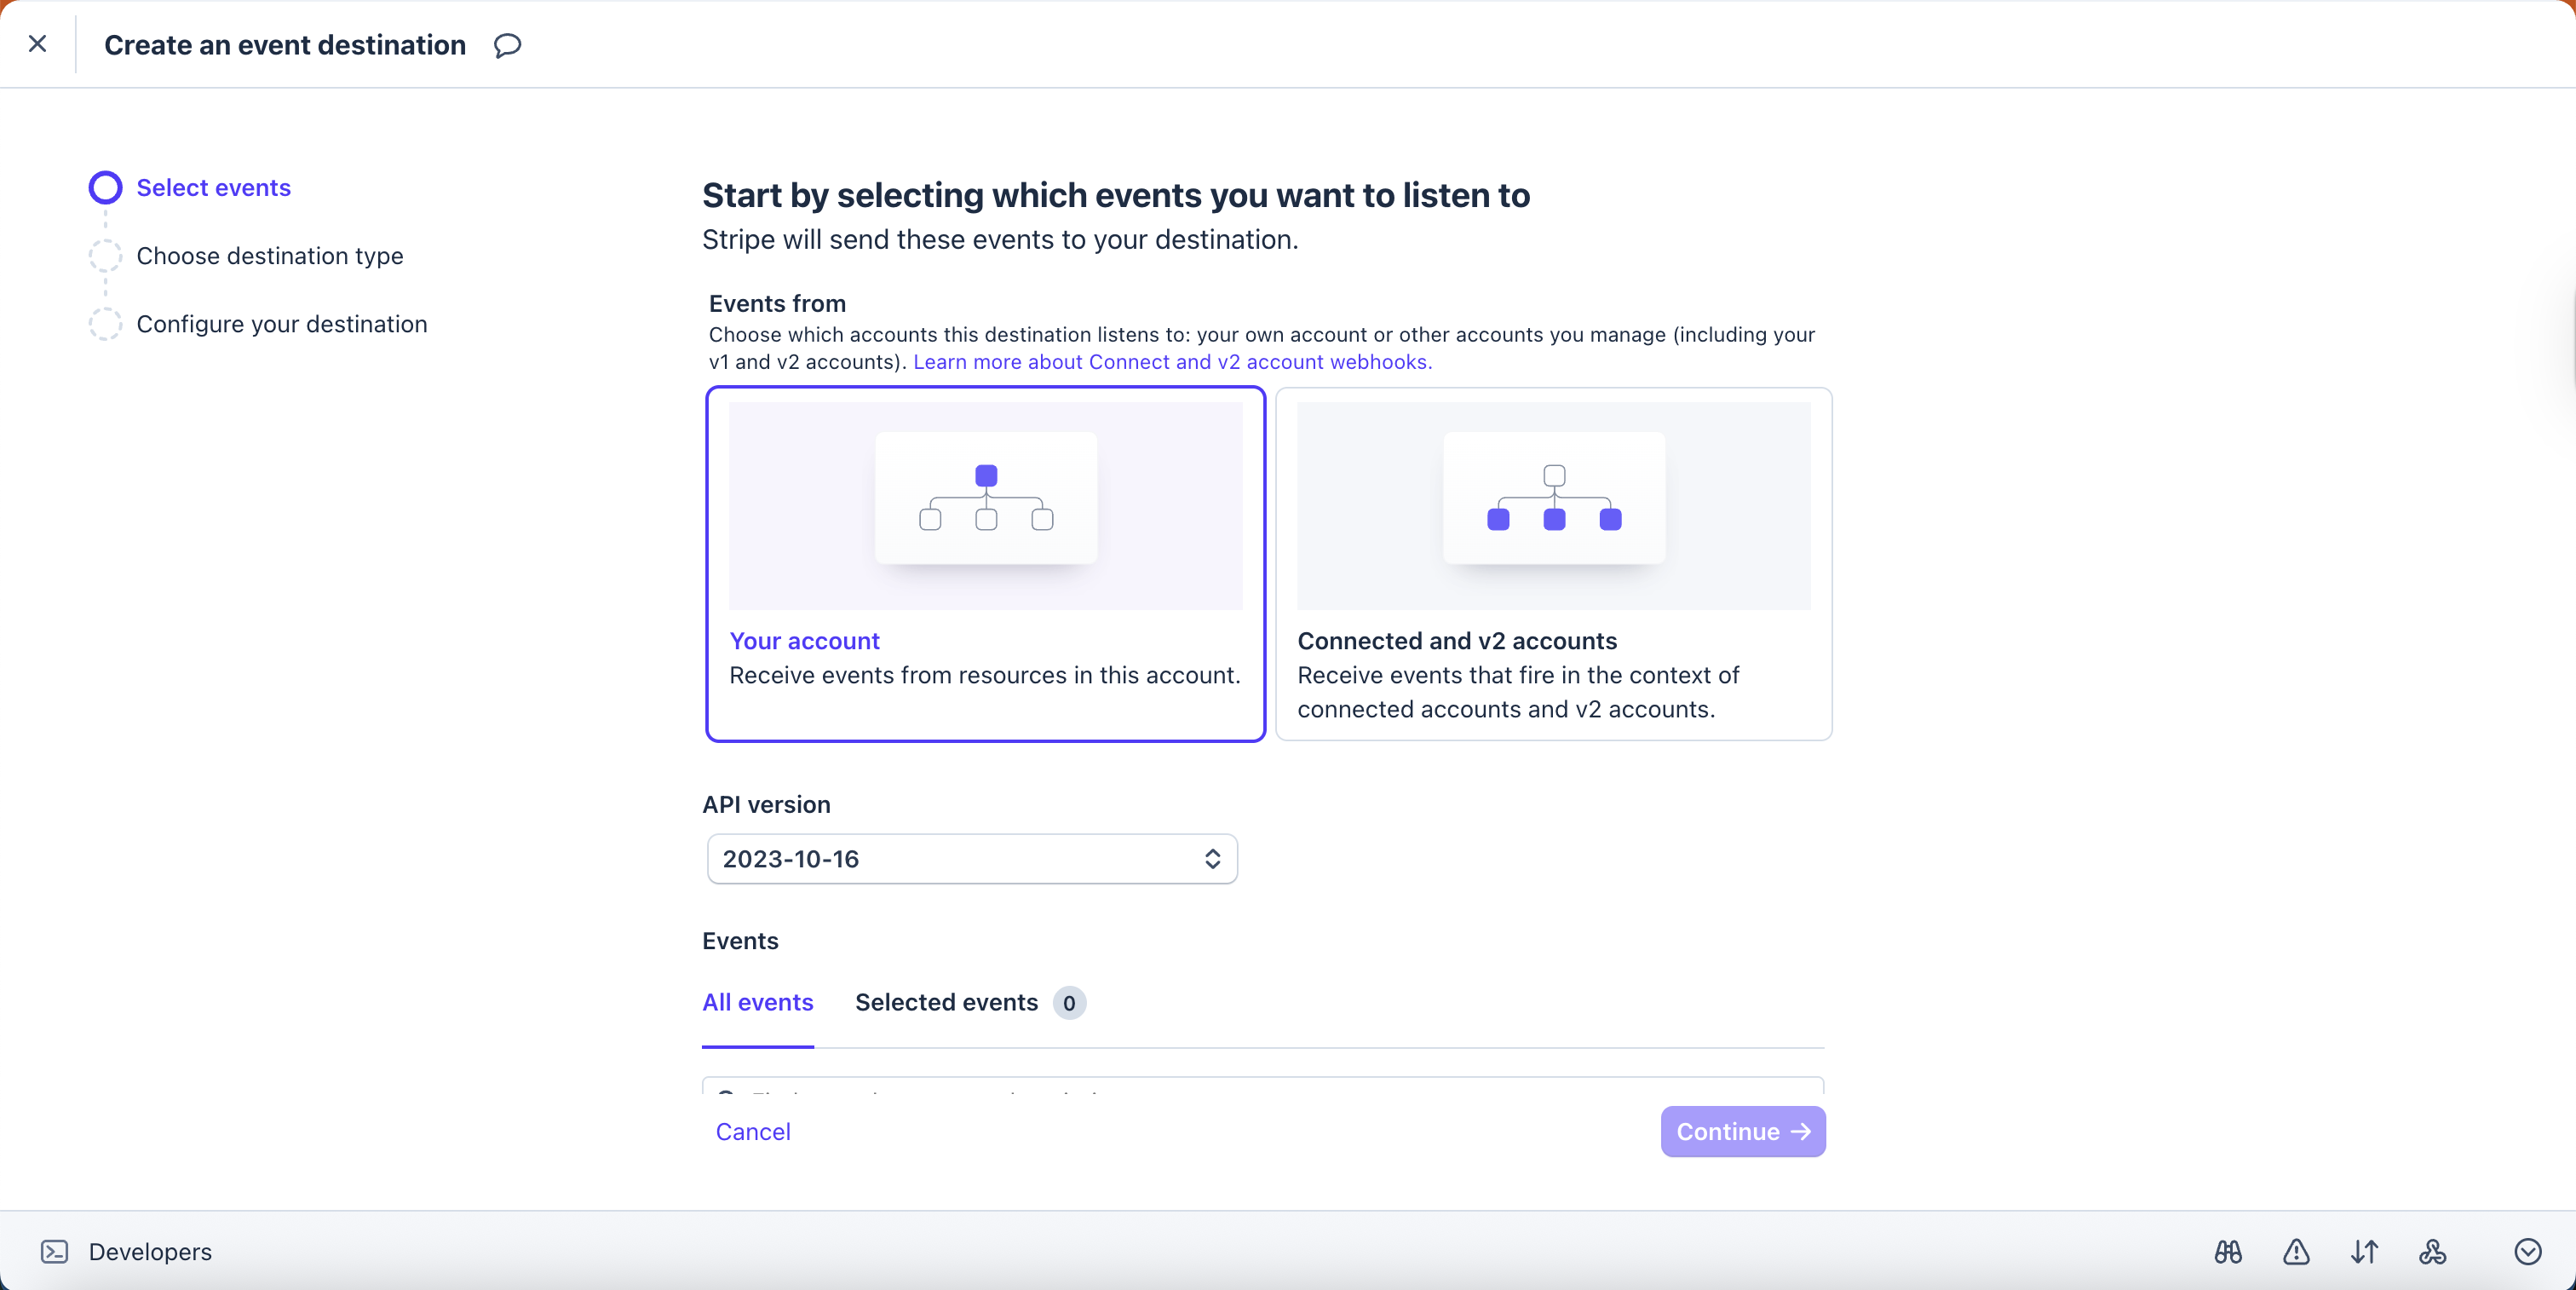
**Creating a webhook endpoint pointing to the URL**
In Stripe, create a webhook endpoint pointing to the URL Cody provides & subscribe to the events:
Go to **Developers** **→** **Webhooks**
Click on "**Add Destination**" to start creating a webhook
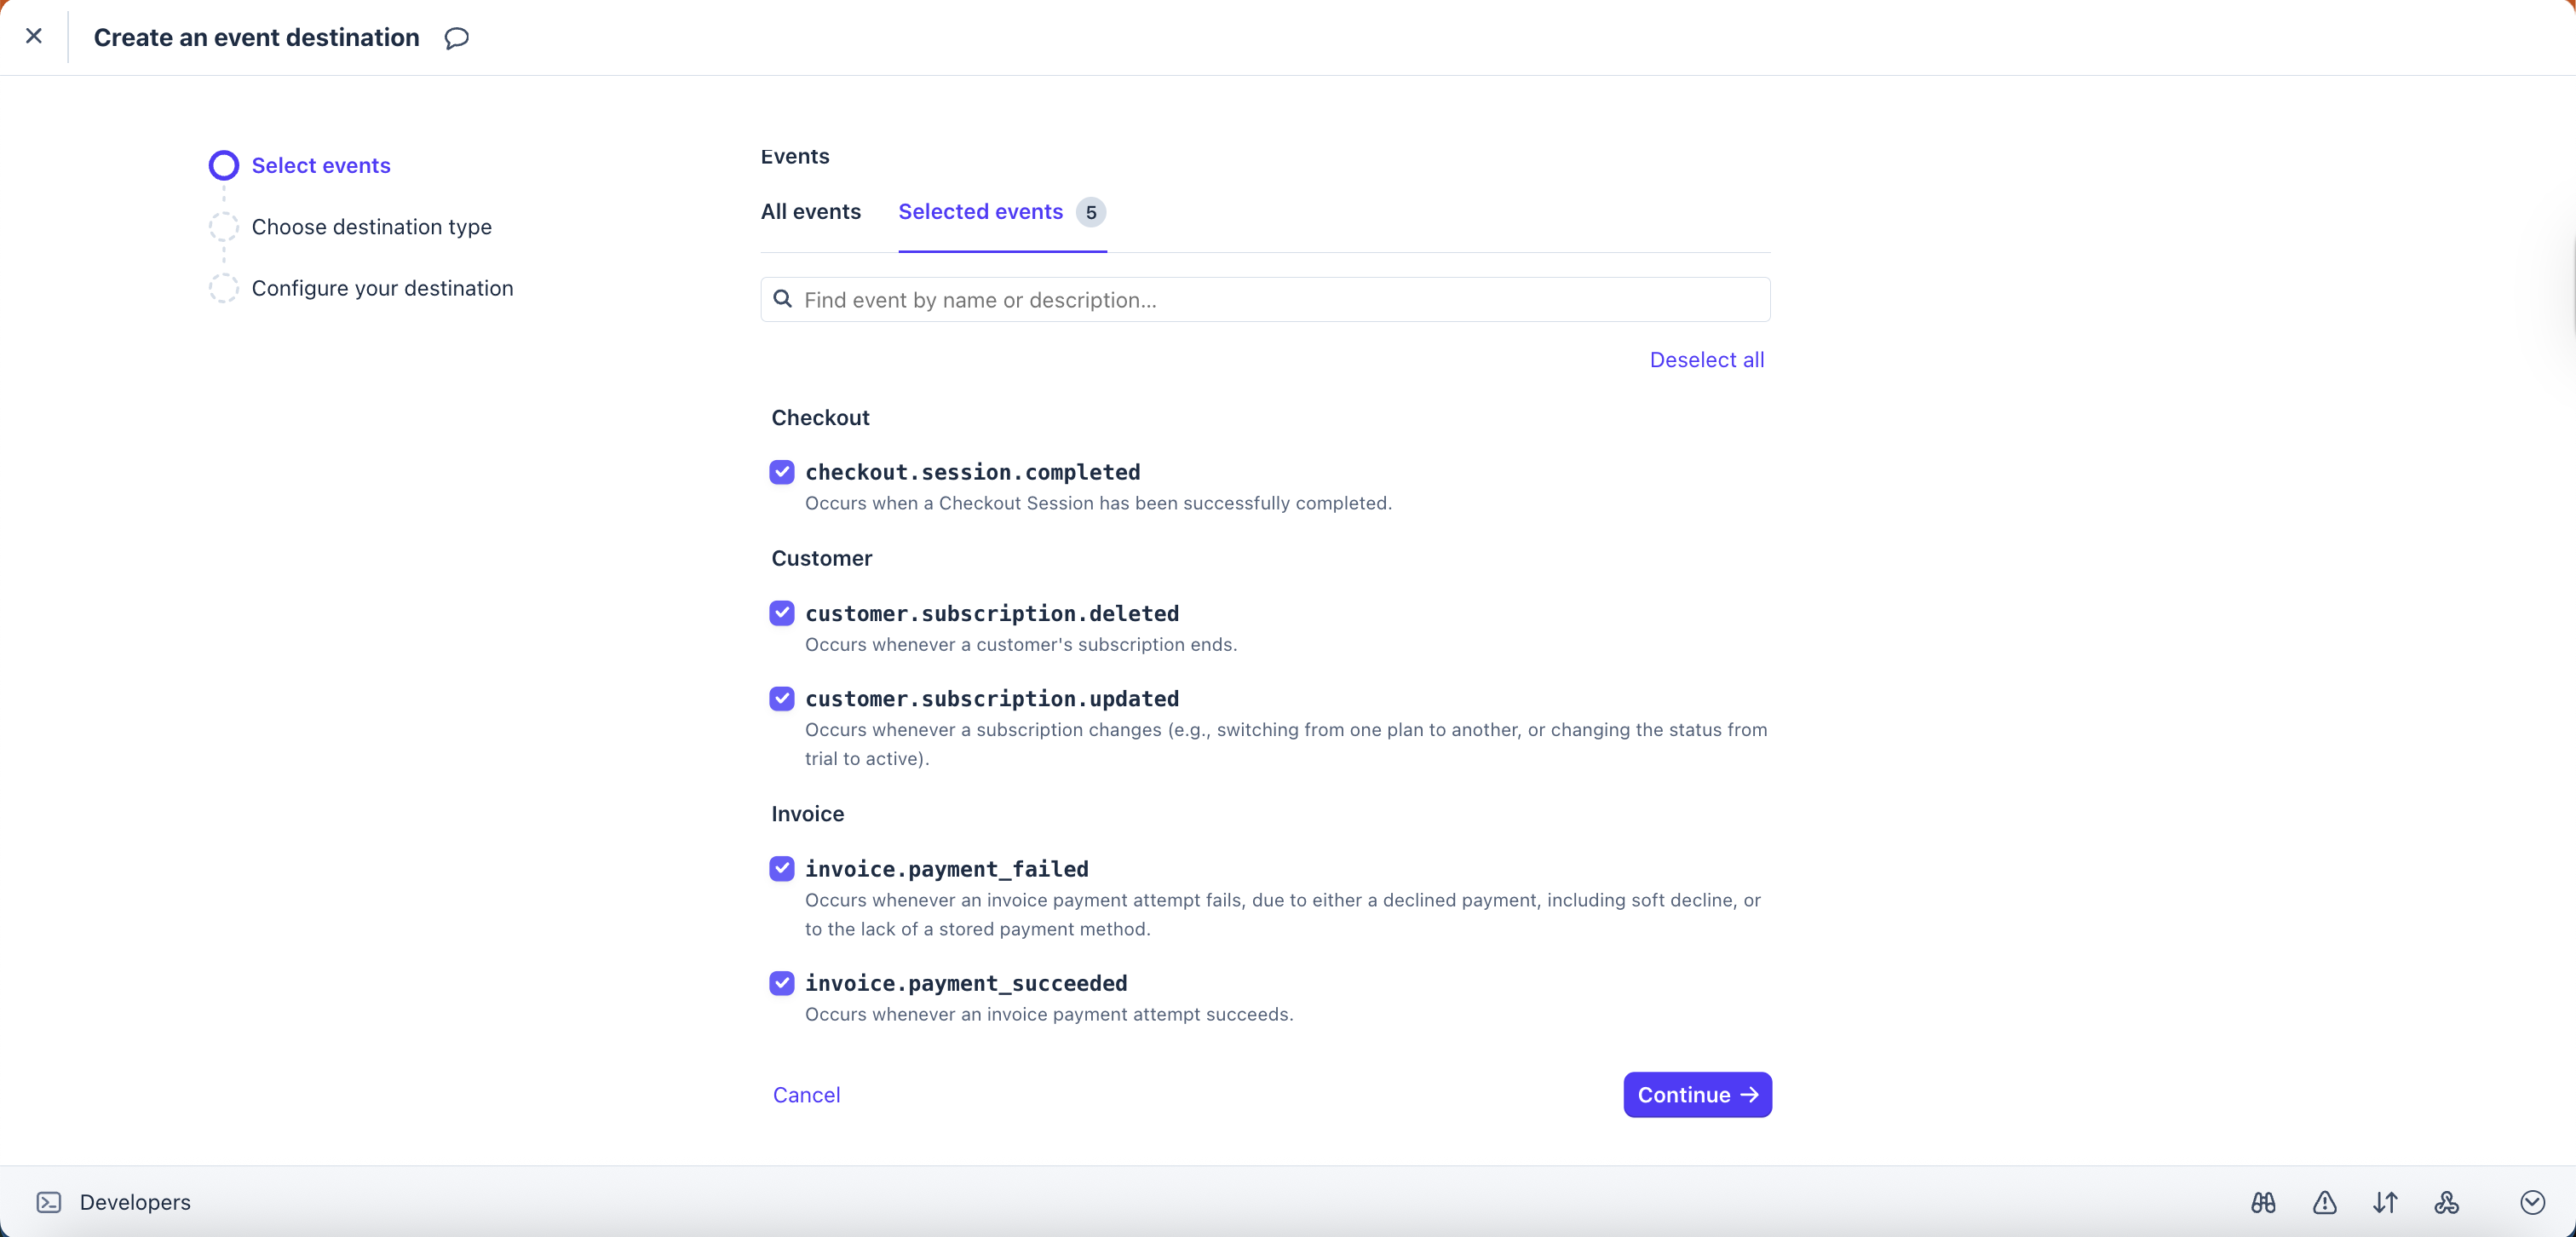
Navigate to **All events** and search for these specific events and add them
1. **checkout.session.completed**
2. **invoice.payment\_succeeded**
3. **invoice.payment\_failed**
4. **customer.subscription.updated**
5. **customer.subscription.deleted**
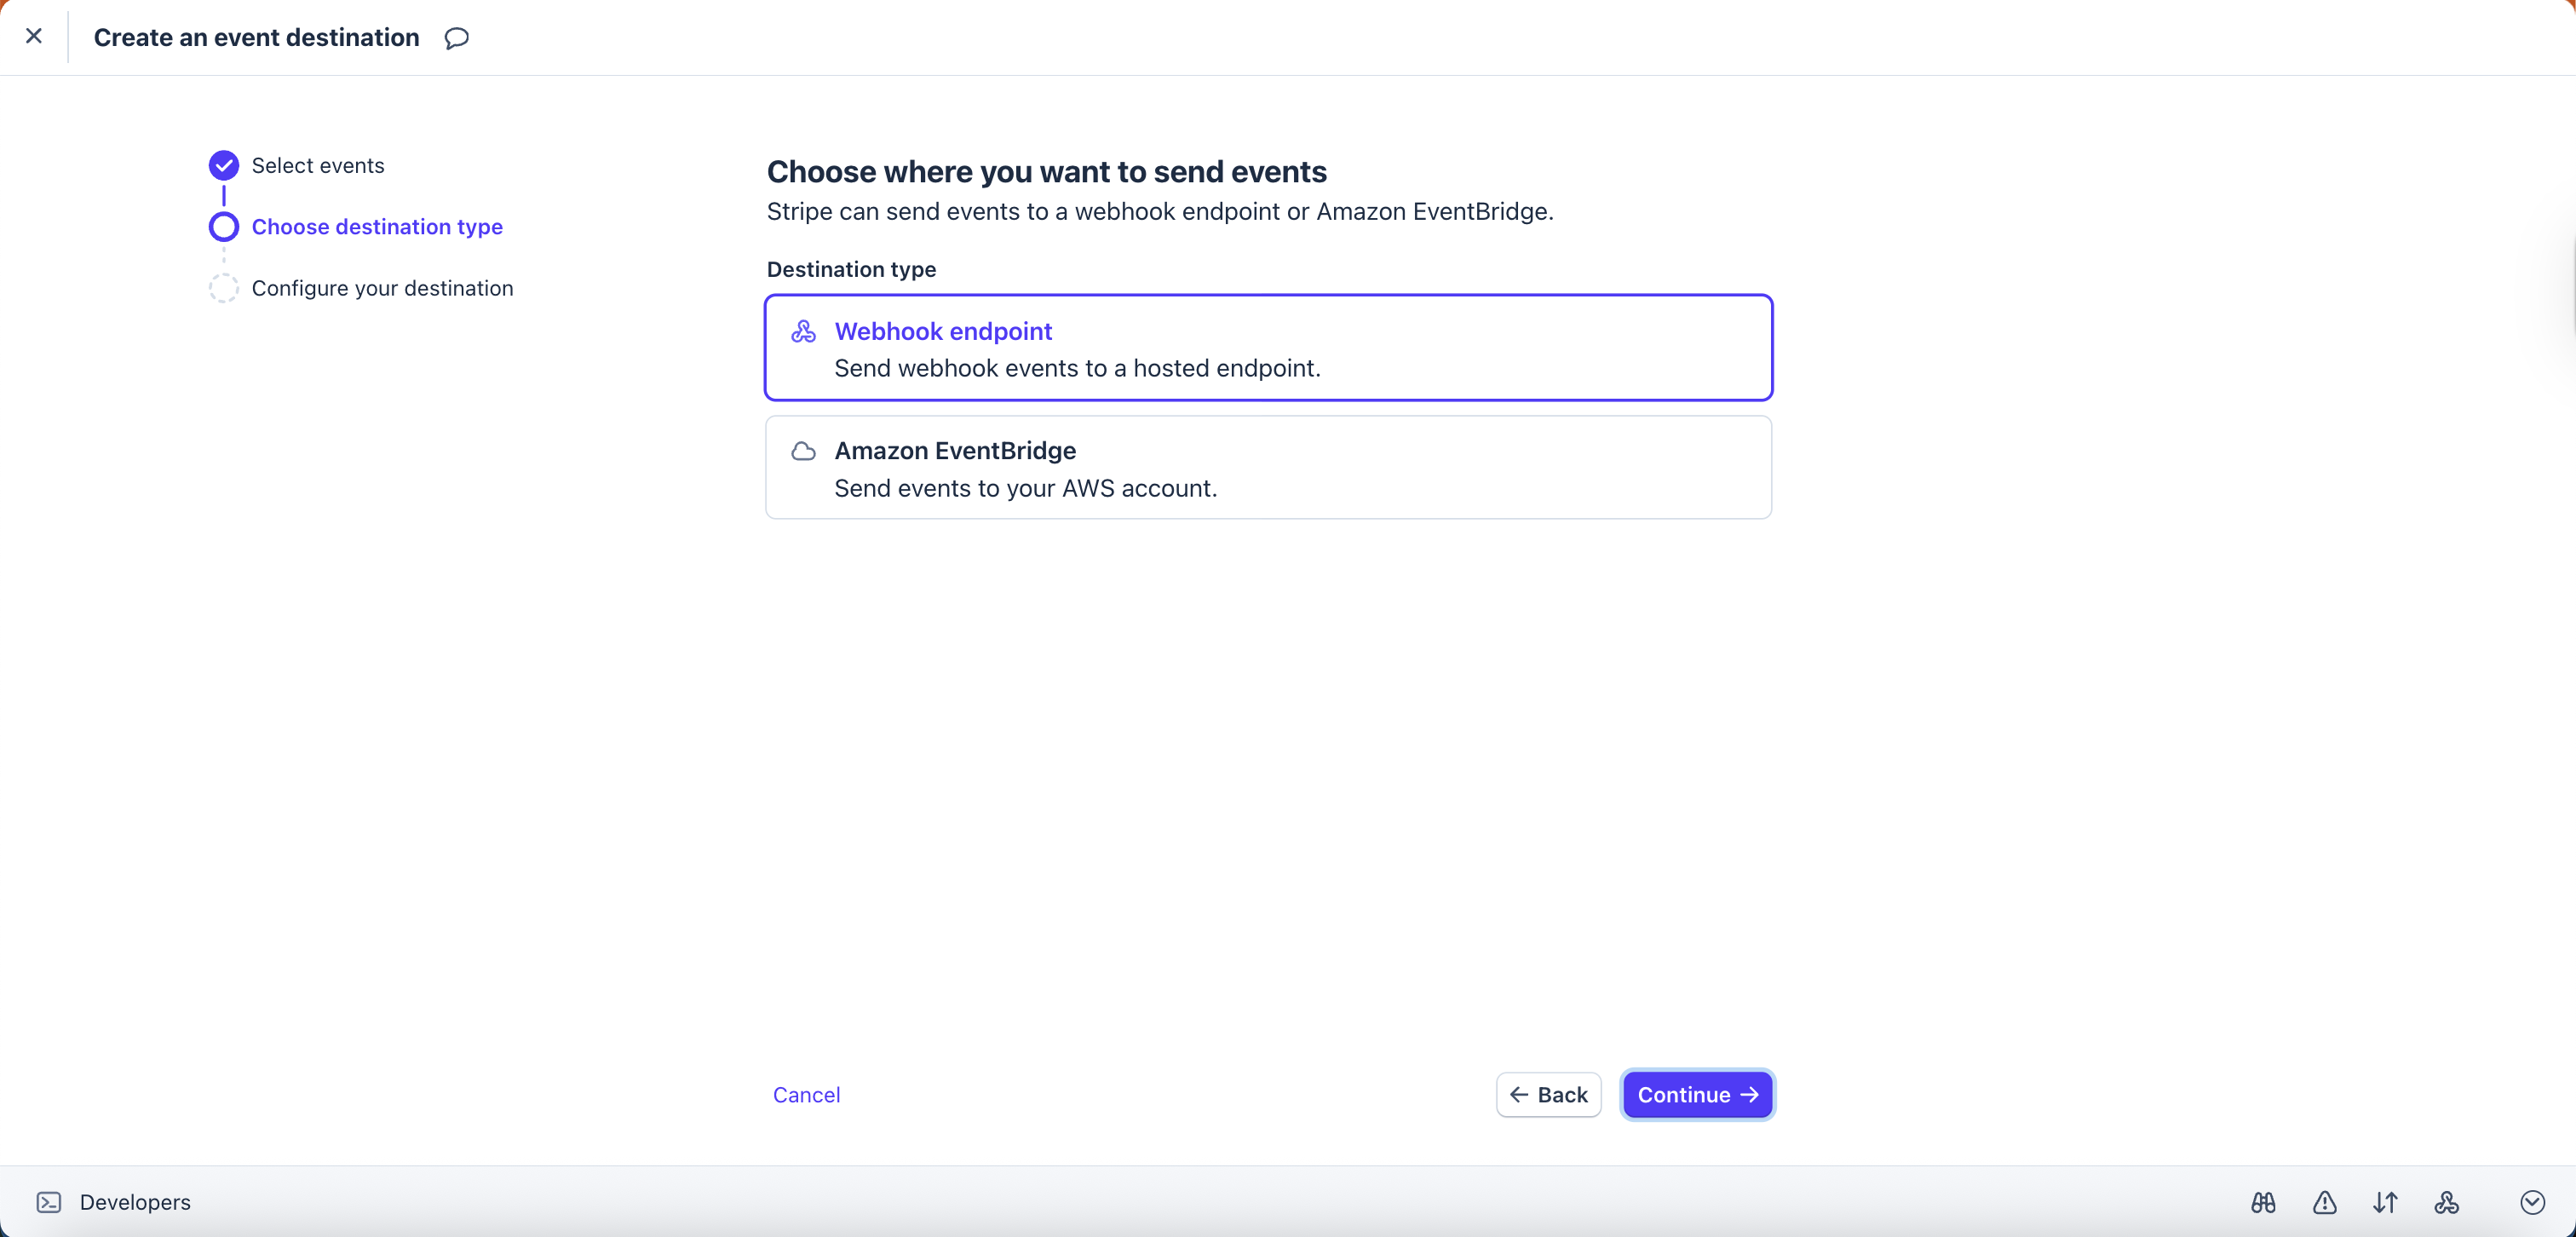
Select **continue** and for the **Destination Type** choose **Webhook endpoint** and continue.
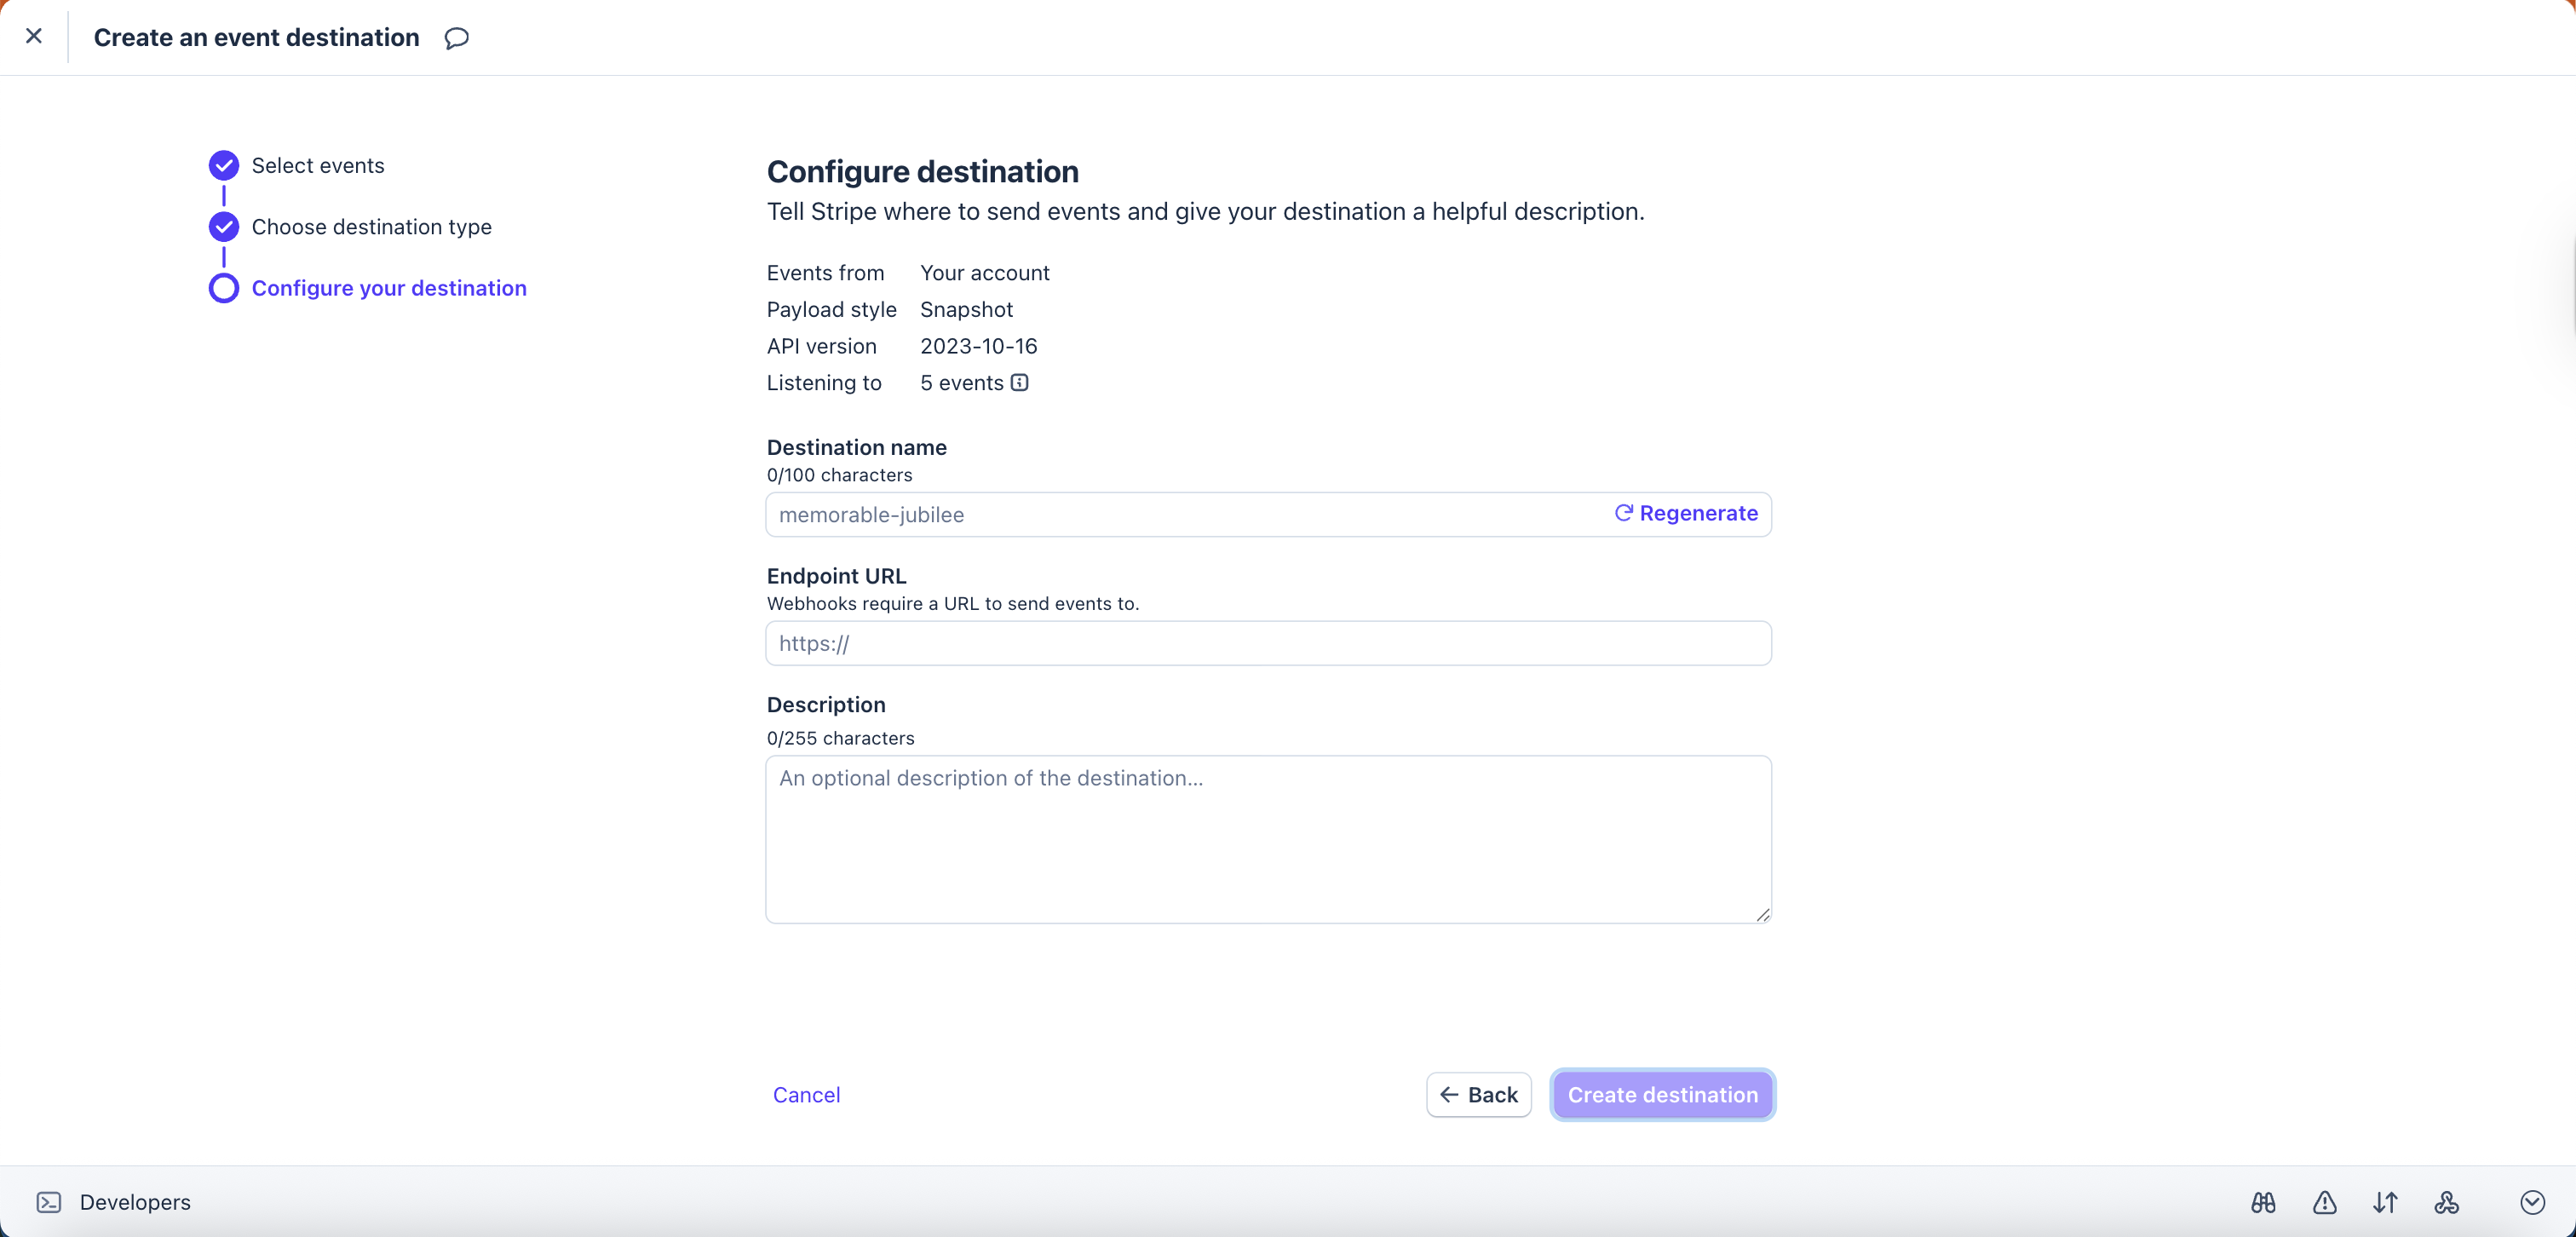
Provide a destination name(any name) and paste the Test **Endpoint URL** Cody shared with you.
Create the destination once the details have been added. You should receive the webhook signing secret after creating the destination, share this with Cody.
{% endstep %}
{% step %}
**Test the payment plans**
Test the payment plans by using the [stripe test card](https://docs.stripe.com/testing) to ensure its working correctly.
{% endstep %}
{% step %}
**Switch to live mode and repeat the same steps**
Share the **Product ID** and the **Price IDs** of the live products and share the **webhook secret** after an **endpoint** for the **live mode** is created.
{% endstep %}
{% endstepper %}
### Summary
**Create your Stripe account and pricing**\
Sign up, complete verification, and create your product(s) and price(s) in Stripe.
1. **Share your Stripe details with Cody**\
Provide:
* Publishable key (`pk_…`)
* Secret key (`sk_…`)
* Price ID(s) (`price_…`) for your plans
2. **Cody builds the integration in test mode**\
Cody sets up:
* Checkout flow
* Subscription status handling
* Billing portal
* Webhook handler
3. **Add the webhook endpoint in Stripe**\
In Stripe, create a webhook endpoint pointing to the URL Cody provides, subscribe to the events above, and share the `whsec_…` signing secret with Cody.
4. **Test end-to-end**\
Use Stripe test cards (for example, `4242 4242 4242 4242`) to simulate:
* Successful payments
* Failed renewals
* Cancellations\
Confirm your app gates features correctly based on subscription state.
5. **Go live**\
Replace test keys with live keys. Real payments start flowing immediately.
#### Webhook signing secret
Webhooks let Stripe tell your app when something happens: payments succeed, renewals fail, subscriptions cancel, and more.
When Cody creates your webhook endpoint, you’ll add it in **Stripe → Developers → Webhooks**. Stripe will give you a signing secret (starts with `whsec_`) so your app can verify events are genuinely from Stripe.
| Secret | Starts with | Purpose |
| ---------------------- | ----------- | ------------------------------------- |
| Webhook signing secret | `whsec_` | Verifies webhook payloads from Stripe |
#### Webhook events to subscribe to
Subscribe to these events for the core subscription lifecycle:
| Event | Used for |
| ------------------------------- | --------------------------------------------------- |
| `checkout.session.completed` | Customer paid—activate access |
| `invoice.payment_succeeded` | Renewal succeeded—extend access |
| `invoice.payment_failed` | Renewal failed—notify and gate access if needed |
| `customer.subscription.updated` | Plan change or cancellation scheduled—update access |
| `customer.subscription.deleted` | Subscription ended—revoke premium access |
You can add more events later, but these cover most apps.
### The subscription lifecycle
A user starts on a free tier, then upgrades through Stripe Checkout. Subscriptions renew automatically each billing period. Users can update payment methods, view invoices, and manage billing through Stripe’s self-service portal.
If a user cancels, they typically keep access until the end of the current billing period. After that, they return to the free tier. If a renewal fails, Stripe notifies the customer and retries the charge over several days. You can decide how access changes if retries don’t succeed.
### Pricing strategies
* **Freemium** works well for most apps: let users experience value, then charge for high-value actions (exports, integrations, premium features).
* **Free trials** are best when the value is clearer after time (for example, after a week of use).
* **Simple pricing** (one plan) is easiest to sell early. Add tiers later when you learn what customers value.
### Security
Payment security is built into the Stripe model:
* Secret keys and webhook secrets stay server-side as backend environment variables.
* Only the publishable key is used in the browser.
* Card data is handled entirely by Stripe—your app never sees or stores it.
* Webhook signatures are verified before any billing event is processed.
* Everything runs over HTTPS.
### Quick reference: What Cody needs from you
| Item | Where to find it | Example |
| ---------------------- | ------------------------------ | ------------------------- |
| Publishable key | Stripe → Developers → API keys | `pk_test_…` / `pk_live_…` |
| Secret key | Stripe → Developers → API keys | `sk_test_…` / `sk_live_…` |
| Webhook signing secret | Stripe → Developers → Webhooks | `whsec_…` |
| Price ID(s) | Stripe → Products → Pricing | `price_…` |
.png?alt=media&token=22a85c22-9544-4c04-a0af-775d667dce17)